Once the license is activated, you can add the nodes (network users) who will work with Synkronizer. This can be done from any workstation, installed on Synkronizer, as long as the user has write access to the license file.
Add Individual Nodes (workstations/users)
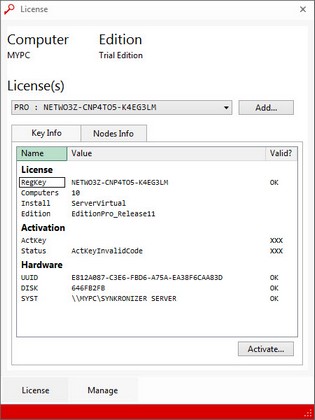
| 1. | Select the Project » System » License Manager. |
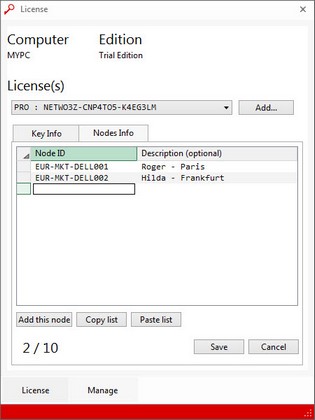
| 3. | Click on the tab "Nodes Info":
|
| 4. | Now you can add the computer/users, who will work with Synkronizer. Simply enter the correct network user ID and the description in the input fields. If you want to add the computer to which you are working, click on "Add this node":
|
| 5. | Confirm the mutations with the Save button.
|
Add a Series of Nodes (workstations/users)
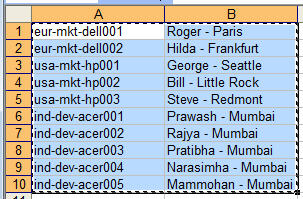
You can prepare a list of workstations (and descriptions) and paste it into the application. The list can be created from a script or typed in a text editor or excel worksheet. Proceed as follows:
| 2. | Create a list with the workstation names and users.
|
| 3. | Select and copy the list
|
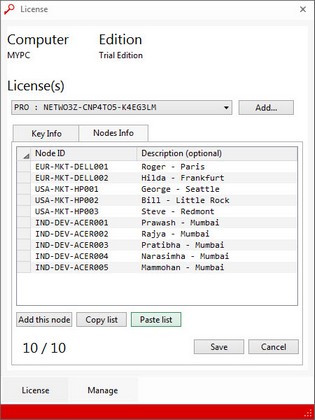
| 4. | Open the "Manage" tab of Synkronizer
|
| 5. | Press "Paste list". The list is filled (with a maximum number of licensed computers)
 |


